Scratch

High Score and Game Over


Part E – Video

Video Transcript

There are just a few details left and our game we will be finished.

One of them is to create the maximum score and display it on the screen.

We will need the variable "HighScore". Let's introduce it into our program just as we introduced the variable "score".

I'll take it to the other corner...

Now open the bone scenario.

At the point where the score changes we have to compare it with "highscore".

If "score" is greater than "highscore" then "highscore" should be equal to "score".

Let's see this in practice.

Very nice! As a final touch to our game we will insert a large sign that displays the message "GAME OVER".

It is certain that this sign will appear at the end of the game.

That is, either when the ghost touches our dog or one of the cars does.

Initially, we should create this tag.

It will be a sprite. Click the "Paint New Sprite" button and draw your message. Let me do it too..

Let's not forget to set it in the center of the stage so that it does not show up at the beginning of the game.

nice!

Now that this sprite displays on the screen at the end of the game, you will need to be informed about it.

That is, both the cars and the ghost have to send out a message that the game is over so that the message is received by the "sign" in order to appear.

Let me first open the ghost script.

Where the game ends, I will enter the instruction to send a message.

From the 'Events' palette, select broadcast message'.

Once you have created the GAME OVER message, replace this instruction with the "Stop All" instruction.

The same code must be introduced to cars as well as they are the ones that cause the end of the game.

Now let's return to the GAME OVER. The sprites that cause the end of the game have sent the message.

We have to make sure that GAME OVER receives it and then it appears.

The instruction is simple. From the instructions palette select "When I receive GAME OVER".

Then it will show up and stop the game.

Let me try it....

The game is ready!

Congratulations!

Think now about changes you could make in order for the game to be more interesting!

Enjoy the game!



Random Movement of Enemy Characters Inside the Maze


Part D – Video

Video Transcript

The biggest obstacle to collecting the bones  will be a small number of cars.

Cars are automatically moved into the maze at the same speed as the dog moves.

In case they touch the dog then the game stops.

If we want to express more accurately the movement of the cars, we could say that:

They move forward as they are initially placed in the maze.

If they touch the maze then they stop and turn randomly either left or right.

Let's create the first car and let's try to achieve exactly this behavior we had just described.

Initially, we need to add the "Car-Bug" sprite into the stage.

The size is too large. Let's set the starting point of the game to 30% of the original.

We want the sprite to move throughout the game. So let's use the repeat instruction "FOREVER".

The instruction of the movement is next. As we have said, it will have the same speed as the dog. So we use the 'move 5 steps' instruction.

If it encounters the maze it will interact exactly in the same way the dog interacts with it. If it touches the maze it should take 5 steps in the opposite direction. This will cause it to stop.

Then it must turn. The turn should be random either to the left or to the right.

As we have seen so far in this game when a random decision has to be taken, we will use the “pick random number' instruction from the 'operators' instruction palette.

The following code succeeds exactly in this random selection in the direction of turns.

Let me try my script now..

I see.


Let's add the code where it manages the car's contact with the dog. THe game has to end there

Very good!

It would be nice to put at the beginning of the scenario the start of the car so that it always starts from there.

Then I will copy this sprite three more times in order to have a total of 4 cars.

I must not forget to make sure that new cars start from different positions than the original one.


Creating the Maze


Part C – First Video

Video Transcript

A very interesting sprite is the ghost.

The ghost of our game will be able to appear in random stages for a few seconds.

In these seconds it will try to catch the dog. If it does, the game will end.

It is therefore an opponent.

Another important detail regarding the behavior of the ghost is that it will be able to pass through walls.

So when we will add the maze we will not have to change this scenario as there is no interaction between them.

Let's add the ghost from the scratch library.

Its size is quite large. I'll cut it down a bit. Let’s say 60%.

I will also change its axis of rotation to horizontal so it never looks upside down.

We will probably need two scenarios running in parallel.

In the first scenario, throughout the game the ghost will chase the dog.

be shown and hidden for a random period of time.

Let me start with the 2nd scenario.

We will definitely need the repeat structure "Forever" as we want the show-hide process to continue throughout the game.

At first we do not want it to appear. From the "looks" instruction palette, use the "hide" instruction.

Then we want it to remain invisible for a random period of time between 5 to 10 seconds.

You need to combine the 'wait' instruction - you will find it in the “control” panel with the scratch instruction that creates random numbers from the palette “operators”.

Very nice.

Once this random time has passed, we want the ghost to move at a random area of our stage and then to appear again.

It is important not to forget to set and then display a random time frame for the ghost to appear until the instructions start running from the beginning.

Let's create the script and try the outcome.

The script works very well. However, when the ghost appears, it remains still.

Also, its contact to the dog does not create any interaction. Let's fix it.

We will create a new scenario. The script will run throughout the game alongside the previous one.

The purpose is to make the sprite always look at the dog and move slowly towards it.

This scenario combines without a problem to the previous one as it does not cancel any of the actions that the previous one performs.

These ghost moves can be done either on the stage or not.

Let me now type the appropriate instructions.

For the duration of the game

Turn to the dog.

Move 1 step.

And if you touch the dog Stop everything!

Let me try it...

It works perfectly. Time to create the maze...


Part C – Second Video

Video Transcript

So far our game has logic. But it's pretty easy.

Dog movement is not limited at all, so it can easily and quickly reach the bone.

A maze would put obstacles in the dog's movement and would make it difficult for the game.

Let's create a new sprite.

Let's call it a "maze".

I will pick the tool line, and after adjusting the color and width I will begin my painting.

Start from the outer outline.

To plan the interior walls, make sure you have 3 important details

The corridors you create will be large enough to allow both the dog and an identical sprite to pass side-by-side.

Your lines should be parallel and vertical to the walls of the outer outline.

Hold the shift key when you want to achieve this. And use the eraser if necessary in order to erase small projections of the walls that can block the movement.

Let me draw. Music please!

Very nice!

Let me now place this sprite right at the center of the stage..

If I run the script now there will be no interaction between the maze and the dog.

The dog will just run through the walls.

We will change that immediately.

Let's bring on the dog's scenario again.

We want to move the dog - If it touches the maze then the movement is reversed.

The dog's movement is 5 steps, if everytime it touches the maze we have it move 5 steps in the opposite direction, then it will actually remain still.

This is exactly how the maze will work as a wall. Let's now see it in action.

I will try the movement first with the right arrow on the keyboard.

If it touches the maze Move 5 steps backwards.

Let's try it..

Very nice!

I have to add these instructions into the movement the other arrows available to the sprite.

Creating a Sprite With Painting


Part B First Video

Video Transcript

After the dog, an important sprite is the bone.

Unfortunately, such a picture does not exist in the scratch library.

So we have to create it.

To create your own sprite, start by pushing the brush with "Paint New sprite".

Essentially an empty canvas opens. In this area you can draw your sprite.

First of all, make sure that the bitmap mode is enabled in the bottom right corner

Then, as this is your first contact with scratch painting, take some time and try out the available tools.

Don't rush. There are several possibilities.

It would be best to freeze the video and take some time to experiment.

Let's create the bone. I will need some music please..


Part B Second Video

Video Transcript

Now we need to program this sprite in order to appear in random places every time the dog touches it.

This is what we want to do throughout the game, so our instructions will be in a repeating structure "Forever". Of course there is a selection structure as the bone moves only if the dog touches it.

If it touches the dog..

The movement of the sprite now is done with an instruction from the tab "motion".

If I explore my possibilities on this palette I will find the instruction "go to position X and Y".

In our case, we want X and Y to be random and different each time.

Scratch has a process to create random numbers within limits set by the programmer.

From the “Operators” palette, drag into the script area the instruction "pick random 1 to 10".

We will use this instruction to create both the horizontal position of the bone expressed in X and the vertical expressed in Y.

The combination of the two aforementioned instructions will solve my problem.

I will combine them logically and try out the solution.

There it is. Very good!

Let me finish this scenario by entering the variable "score".

I remind you that a variable is a box in the memory of our computer that stores information.

The variable score will count the number of bones our dog eats.

Every time a dog touches a bone, the variable score will store a number 1 greater than what it just was

Of course, at the start of the game the score will be 0.

Go to the "Data" instruction palette and click the button "Create a variable".

The name of our variable is “score” and it applies to all sprites.

Watch how the counter for the variable has already appeared on the top left of the screen.

We want the variable to have a value of 0. This value should rise by 1 as soon as the bone touches the dog.

At this time I will also import a sound from the scratch library.

Once the bone is eaten, the sound is heard. It's an interesting detail in our games.

Let me use the appropriate instructions and try the script.

Move the Hero with the Keyboard Arrow Keys


Video – Part A First Video

Video Transcript

Good evening!

In this lesson you will watch step-by-step the creation of the electronic game titled: "Grab the bone".

The software to be used is Scratch.

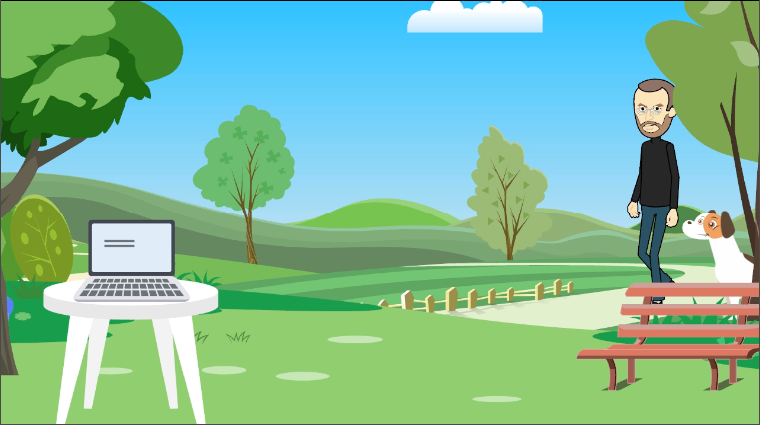
We will connect to Stevie, who is in the countryside along with his dog, to show us all the details and all the steps needed in order to create this game on your computer.

This lesson consists of 5 parts. In each of these 5 parts a detailed presentation of an aspect of the game is presented.

Attention! It is not enough to simply watch this video. You will need most of the videos to watch them over and over again.

So do not worry if you feel the need to do that. You have to do it.

Also make sure your attention is not distracted from the movements of the sprites contained in the videos.

They have been created to make videos more enjoyable but under no circumstances would we want to overcome the content of the video and its educational goals.

Have fun!


Good evening!

The game we are about to create in this lesson is called "grab the bone".

It is a game whose stage is a labyrinth as it contains several paths and routes.

A basic first step to start is to watch a few seconds of the game and absorb some information about its basic features and components.

Please have a look at the video and we'll be right back.

All games have a purpose.

The purpose of "grab the bone" is to collect as many bones as possible.

The dog collects bones while trying to avoid fast cars that are trying to hit it, but also the ghost that can appear and disappear at any point of time.

The hero of the game, the dog, is allowed to move in any way in the game labyrinth but can’t touch the cars and the ghost.

If that happens the game ends. This is the only rule of the game.

Basic sprite of the game is the dog.

The dog moves anywhere on the screen the labyrinth allows.

The way the user moves it is with the keys on the keyboard.

The main sprite of our game is bones.

Bones appear randomly in the labyrinth of the game.

Every time the dog touches a bone - it disappears and appears immediately somewhere else in the labyrinth.

At this point the score rises by 1.

Under no circumstances should I forget to mention that the labyrinth is also a sprite.

We could use some labyrinth image as a backdrop, but it would be very difficult to check if a sprite has touched the labyrinth so that we could activate a reaction in this case.

Also another sprite is the GAME OVER message that displays at the end of the game.


Video – Part A Second Video

Video Transcript

In the game 'Grab the Bone', the dog is moved by the player in the labyrinth with the arrow keys on the keyboard.

Let's start our game by forming this. That is, the scenario that moves our sprite -our protagonist.

As a first step of course you have to start Scratch. Then, you have to delete the cat and enter the dog from the Scratch library.

Let me move on to these actions.

First, I need to change the sprite's size.

So, when the green flag is clicked, the size of the sprite is 25% of its original size.

Then I use the appropriate commands to make the dog look and move upwards if the user pushes the top arrow from the keyboard.

Obviously, we need a selection structure.

From the "control" tab we then need the IF command.

If the up arrow button is pushed then our character should point upwards but also move a little bit forward.

The commands that will be in the IF are in the "motion" command palette.

If a specific key is pressed, we will find it in the “Sensing” palette.

Let's create this IF and let me try it to see if it works.

We see something is wrong.

Our script does not work. The reason is obvious.

The script's instructions are executed one by one and the script ends before we hit the top arrow.

We want this code to run throughout the game.

We have to enter into a repeat order "Forever". Let's do it and let's try again.

Let's do it and let's try again.

The Game Gets Difficult as Time Passes

Video - The Game Gets Difficult as Time Passes


Video Transcript

So far we have introduced 4 of the 5 characters to our game. We will soon finish it.

A little more patience, but I ask you to pay great attention because we have a few but very important issues to deal with.

Let's get back to my computer screen and continue.

It is time to place the last object - bananas into our game, the bananas

So follow the now familiar process and enter the bananas sprite into our game.

We want the bananas, initially, to disappear as soon as the monkey touches them and appear at some other random spot on the stage.

We also want to count scores, but we'll do it right afterwards.

Let's concentrate on the appearance of the object elsewhere in the scene as soon as the monkey makes contact.

In the banana scenario, once the green flag is clicked, we want them to be smaller since they are pretty big, if they touch the monkey, they will move to another place.

The IF we shall use is obvious. Let's enter it into our scenario.

In the IF statement we definitely need an instruction from the command palette "Motion" given the fact that bananas will move somewhere else.

If we carefully explore the commands of this palette, we will locate the instruction:

Go to x and y. Where x and y are specific values that express a particular position on the stage.

Here I will need a little help from the specialist to explain it a bit better...

The positions of the sprites at Scratch are expressed with 2 numbers.

The first number is known as X and expresses the horizontal position of the object.

The values that it can take are from -240 to 240.

If the value of X is equal to 0, then the object is in a central position horizontally on the stage.

That is, the distance from the left edge of the stage is definitely equal to the distance from the right edge of the stage.

If X is equal to -240 then the sprite is definitely somewhere on the left edge of the stage while 240 is at the right edge of the stage.

Similarly, the value of Y can takes values from -180 to 180.

If it is 0 then the distance of the sprite from the upper end of the stage is equal to the distance from its lower end.

If Y has a value of 180 then it is, depending on the value of X, somewhere in the upper end of the Scratch stage, while with -180 at the bottom.

The precise position of a sprite is determined by the value of both X for its horizontal position and Y for the vertical.

Indeed

Every time the banana touches the monkey, it moves to another location. What we want is each time this position to be different and random.

Scratch has a process to generate random numbers within limits set by the programmer.

From the Operators palette, drag into the script area the instruction "pick random number from 1 to 10"

We will use this instruction to create both the horizontal position of the banana expressed with X and the vertical expressed with Y.

I must not forget to incorporate all this IF in a repetition order "forever" as the banana movement after contact with the monkey - we want this to happen throughout the game and not just once.

Let me first create the command "go to X and Y" in combination with the command "pick random number" and then after integrating it into my script let me try the outcome.

Show Enemy Character at Random Position

Video - Show Enemy Character at Random Position


Video Transcript

So far we have introduced 4 of the 5 characters to our game. We will soon finish it.

A little more patience, but I ask you to pay great attention because we have a few but very important issues to deal with.

Let's get back to my computer screen and continue.

It is time to place the last object - bananas into our game, the bananas

So follow the now familiar process and enter the bananas sprite into our game.

We want the bananas, initially, to disappear as soon as the monkey touches them and appear at some other random spot on the stage.

We also want to count scores, but we'll do it right afterwards.

Let's concentrate on the appearance of the object elsewhere in the scene as soon as the monkey makes contact.

In the banana scenario, once the green flag is clicked, we want them to be smaller since they are pretty big, if they touch the monkey, they will move to another place.

The IF we shall use is obvious. Let's enter it into our scenario.

In the IF statement we definitely need an instruction from the command palette "Motion" given the fact that bananas will move somewhere else.

If we carefully explore the commands of this palette, we will locate the instruction:

Go to x and y. Where x and y are specific values that express a particular position on the stage.

Here I will need a little help from the specialist to explain it a bit better...

The positions of the sprites at Scratch are expressed with 2 numbers.

The first number is known as X and expresses the horizontal position of the object.

The values that it can take are from -240 to 240.

If the value of X is equal to 0, then the object is in a central position horizontally on the stage.

That is, the distance from the left edge of the stage is definitely equal to the distance from the right edge of the stage.

If X is equal to -240 then the sprite is definitely somewhere on the left edge of the stage while 240 is at the right edge of the stage.

Similarly, the value of Y can takes values from -180 to 180.

If it is 0 then the distance of the sprite from the upper end of the stage is equal to the distance from its lower end.

If Y has a value of 180 then it is, depending on the value of X, somewhere in the upper end of the Scratch stage, while with -180 at the bottom.

The precise position of a sprite is determined by the value of both X for its horizontal position and Y for the vertical.

Indeed

Every time the banana touches the monkey, it moves to another location. What we want is each time this position to be different and random.

Scratch has a process to generate random numbers within limits set by the programmer.

From the Operators palette, drag into the script area the instruction "pick random number from 1 to 10"

We will use this instruction to create both the horizontal position of the banana expressed with X and the vertical expressed with Y.

I must not forget to incorporate all this IF in a repetition order "forever" as the banana movement after contact with the monkey - we want this to happen throughout the game and not just once.

Let me first create the command "go to X and Y" in combination with the command "pick random number" and then after integrating it into my script let me try the outcome.

The Enemy Character Following the Hero

Video - The Enemy Character Following the Hero


Video Transcript

Good evening!

This lesson, consisting of 3 parts, is the last for the game "Banana Hunt".

If you've followed Steve's and the experts’ instructions, you are very close finishing this game.

By ending the game, invite your friends to play it and suggest you ways to improve it.

With the knowledge you have acquired from the process of creating the game you can change it enough in order for it to become our own unique game.

Before making your personal changes you should watch Stevie and the experts very carefully as in the 3 parts of this lesson they will present very important information.

Your absolute concentration is required.

In these 3 parts of this lesson, Stevie will speak to you from his office.

Stevie you can start..


Good evening!

We've gone a long way in creating our first game.

It has already the desired structure and runs quite well.

But there are more things to be done.

First of all, let's remember with a video what we have done so far.

We will watch the video in fast forward and its purpose is to remind us of our actions so far.

Let’s watch it...

Very nice.

We have already created a lion that prevents us from reaching our goal. Let's create the 2nd.

The 2nd lion will have a similar scenario with the 1st one. It will just move on a different route.

So the monkey’s actions will be even more difficult.

We will create the 2nd lion in a way that is the same to the 1st one and then we can make small changes to the script, the process is simple, easy and fast.

From the object area,   right click (ctrl + click if you have Mac PC) on the 1st lion and choose "duplicate".

The 2nd lion is created. Its name is Lion2. We do not have to change it.

In exactly the same way we create the 3rd Lion.

Let's try our game now.

You can see the three lions moving almost together to the same direction.

We will change the direction of both the 2nd and 3rd lions.

In the second lion's scenario, let's change the direction that the object starts at 15 and the 3rd at -15.

Let me now try my game...

I see that it is getting difficult. We will improve it later.

Let's play my game again. I will make two observations.

The first observation is that the lions are moving very fast. Let's see it again.

Yes. To reduce their speed, we can change the number of the steps.

I will change the 2nd lion’s steps from 10 to 2 and the 3rd lion’s from 10 to 6. Let's see the result.

It is better now. Don’t forget to make your own game and save the settings you like.

However, I suggest you to keep the settings I suggested and make changes at the end according to your own preferences.

My second observation is that the three lions follow their own path.

No one is following the monkey.

Don’t forget that the main goal of our game is that the lions are hunting the monkey to eat it.

Let's change the direction of the second lion to follow the monkey.

In this scenario, for the entire duration of the game, just before moving, let's set it to change its direction depending on where the monkey is.

The command block we need is in the pallet “motion” and is called "point towards the monkey".

Let's see what we have done so far...

It's good. I think we need to improve it further, though.

How Our Hero Will Lose

Video - How Our Hero Will Lose


Video Transcript

Let’s begin programming by creating a script that defines the monkey’s behavior.

We will program the monkey to move along with the mouse of the game player.

So, follow the steps below:

Step 1: Open the Scratch application

Step 2: Delete the cat from your screen.

Step 3: Enter the Monkey2 character from Scratch’s library into your project.

Step 4: Change the name of the object to “monkey”.

Step 5: We want the monkey’s move to begin from the moment the game starts.

This can happen by pressing the green flag. From the commands palette “Events”, locate first and then drag with your mouse the command “when the green flag is clicked” and drop it in the space of the scripts’ area.

Step 6: Of course, the object’s movement is defined by a command on the “Motion” palette.

Open this palette and look all the commands, one after the other.

You will find the command “Go to mouse pointer”.

Drag this command to the script area and join it with the previous command, as in a puzzle.

Now, try your script.

The monkey moves to where you have your mouse pointer: the green flag that you have just clicked on.

The movement of the mouse pointer does not mean a corresponding movement of the object. Some change should be made.

Step 8: We want the “Go to mouse pointer” command to be repeated continuously throughout the game process.

The key word here is the word “repeated”. We should use a repeat block.

Let’s listen to what the specialist has to say about this issue.

Often, we want the commands created in Scratch, but also in any programming language, to be running repeatedly.

The existing commands in Scratch that repeat the commands they contain are the following:

  • Repeat a specific number of iterations
  • Repeat until an event occurs
  • Repeat forever

The command “forever” repeats the enclosed commands for the entire duration of the game.

This command, like any of the commands just mentioned, may contain 1, 2 or more other commands executed in order, one after the other.

Once the commands finish, they run again from scratch.

In the command “forever” this continues until the end of the game.

The command “forever” is exactly what we need in this game. We will use this command.

So, drag the “forever” command to the script area and use it this way.

Now, run your project and try the result.

Congratulations! You have just created your first project in Scratch!